Installation across a network
We provide an MSI file for companies that you can use for automatic installation on your Windows systems.
Deploy O&O Syspectr using Group Policies
In order to use O&O Syspectr, the program must be installed on every computer. Installation can be carried out in two different ways:
- Manual installation on the computer using the installation file (EXE or MSI)
- Automatic roll out of the installation file using the group policies of the Windows Active Directory (MSI file only)
Once installation is complete, there is no further need for user involvement. Updates and new modules will be automatically rolled out with the O&O LiveUpdate service provided by O&O Syspectr.
The following will describe the necessary steps for rolling out O&O Syspectr using group policies.
Requirements
O&O Syspectr roll out requires the following:
- You’re using a Windows Active Directory (AD).
- The computers where you want to install O&O Syspectr are connected with the AD and there are enough permissions available for remote installation. You can find additional information in the Microsoft Article “Open Group Policy Software Installation”.
- You have downloaded your personalized MSI file from your O&O Syspectr account. To do this, go in your account to “Add computer” and select the MSI file.
- The Microsoft .NET Framework 4.6.1 or higher is installed on the target computer. The download link can be found on this Microsoft Page.
Please note that the name of the MSI file may not be changed! Based on this name, the computer where installation is taking place will automatically be added to your account.
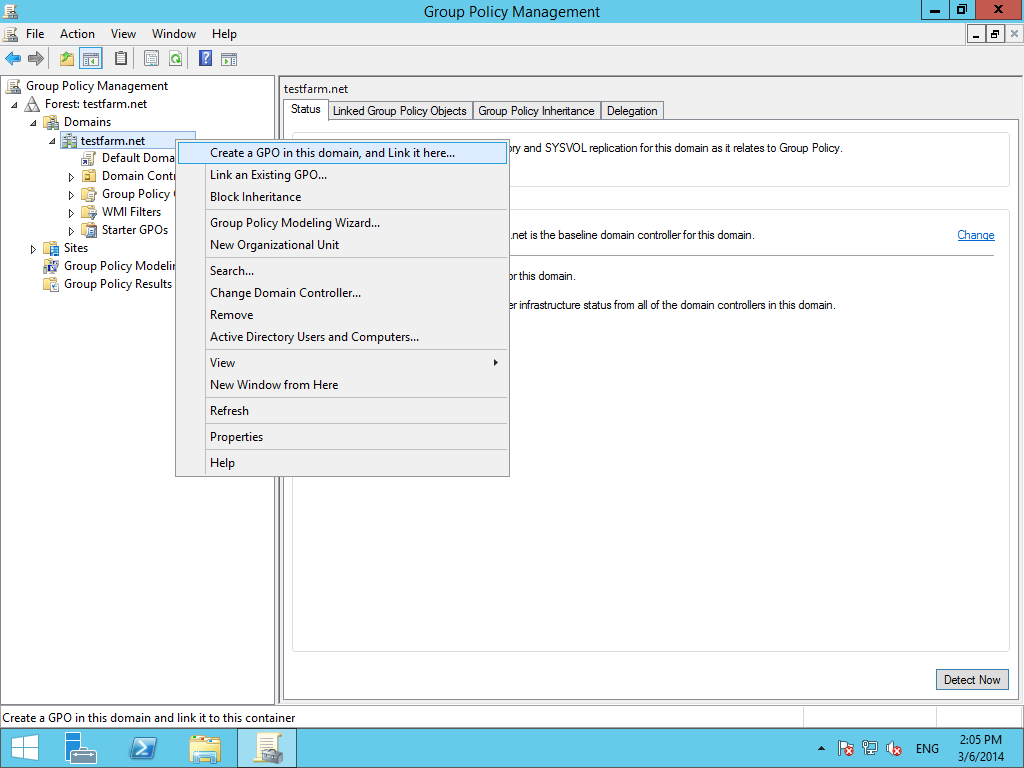
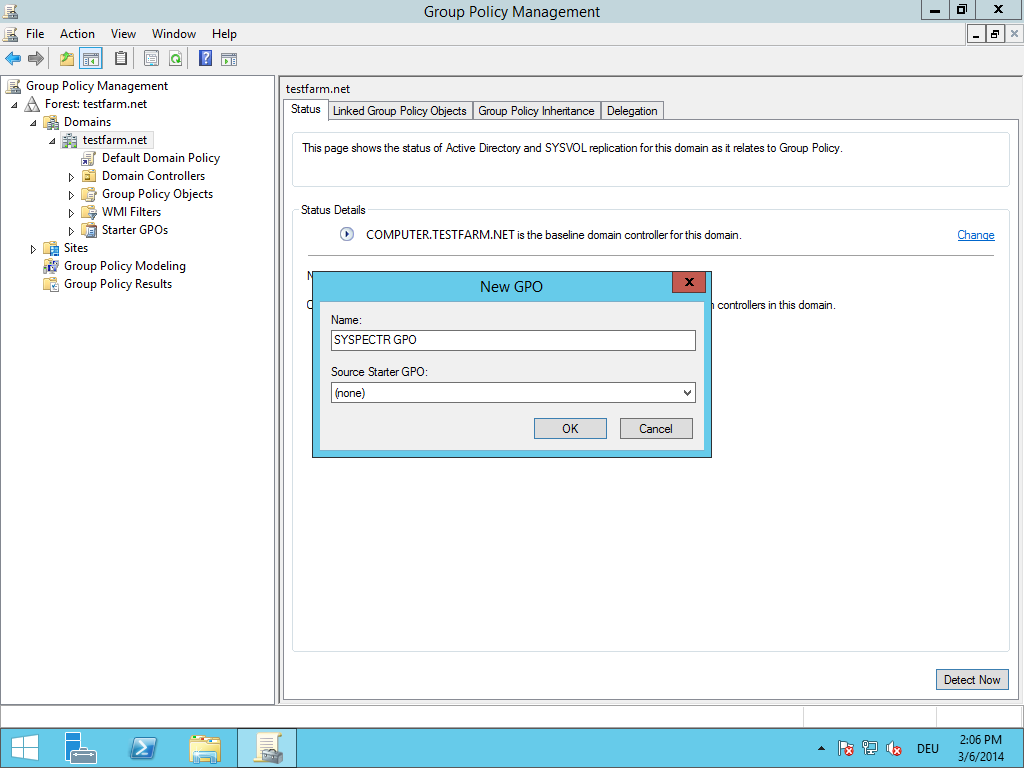
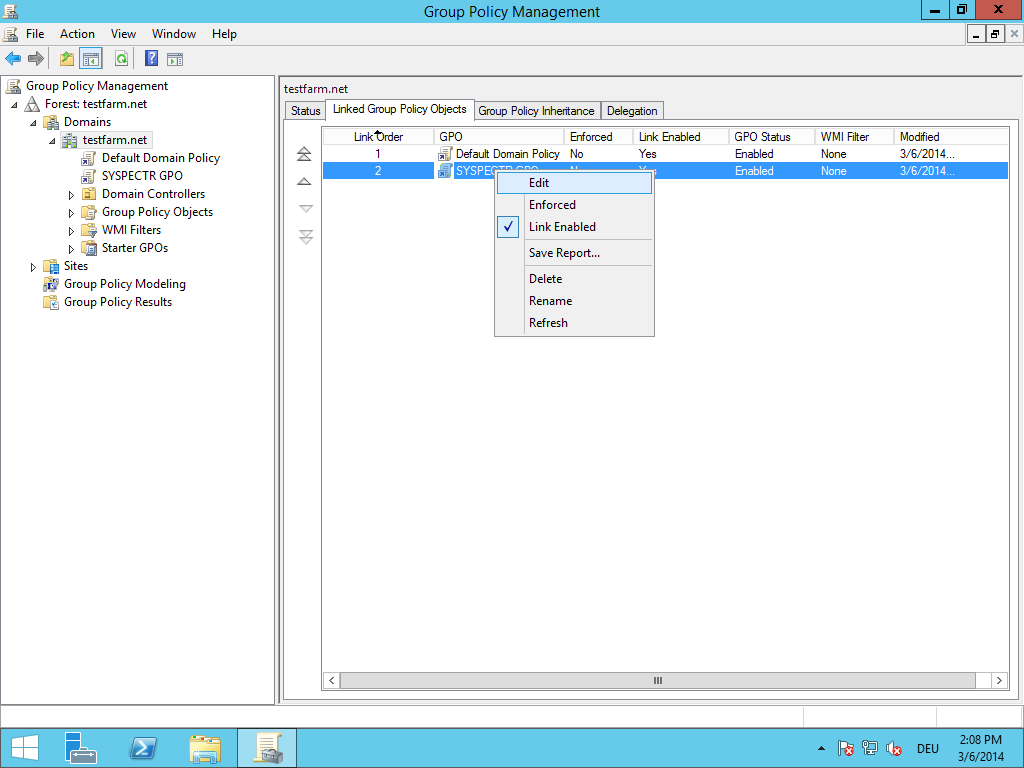
Creating the group policy for O&O Syspectr
-
Start the group policy editor. You can find methods for opening this Microsoft TechNet Article.
-
Create a new group policy for your domain and name it, for example, “Syspectr GPO”
-
Select the policy and click “Edit”. You’ll now be moved into Group Policy Management.
-
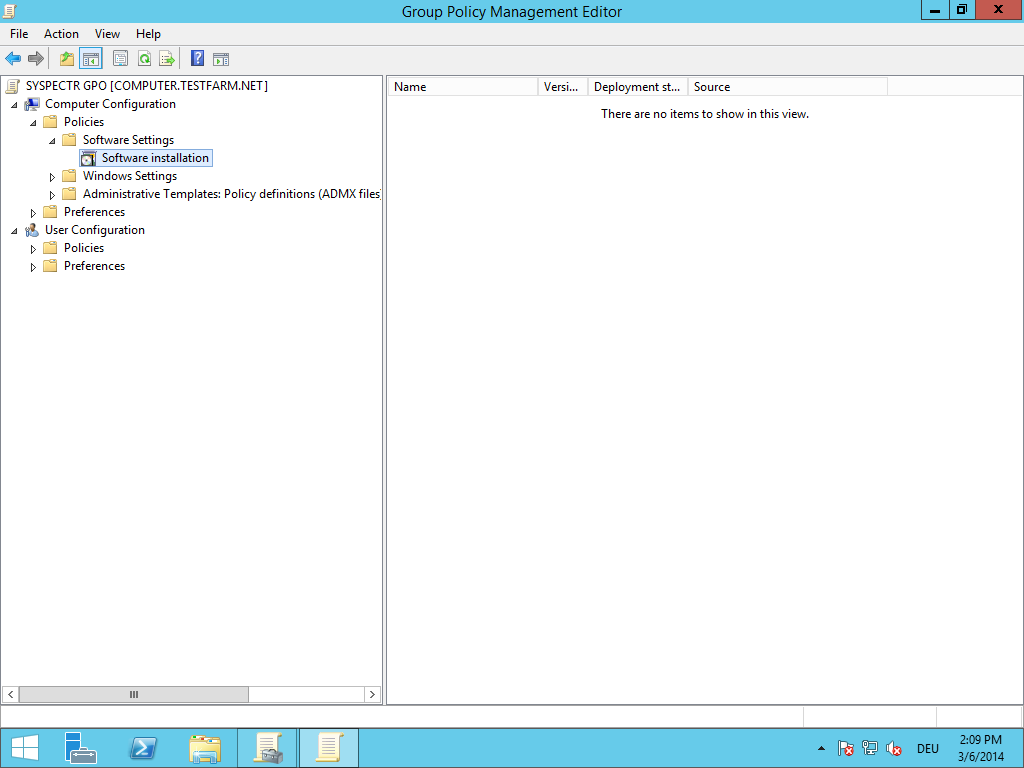
In Group Policy Management, select Computer Configuration > Policies > Software Settings > Software installation
-
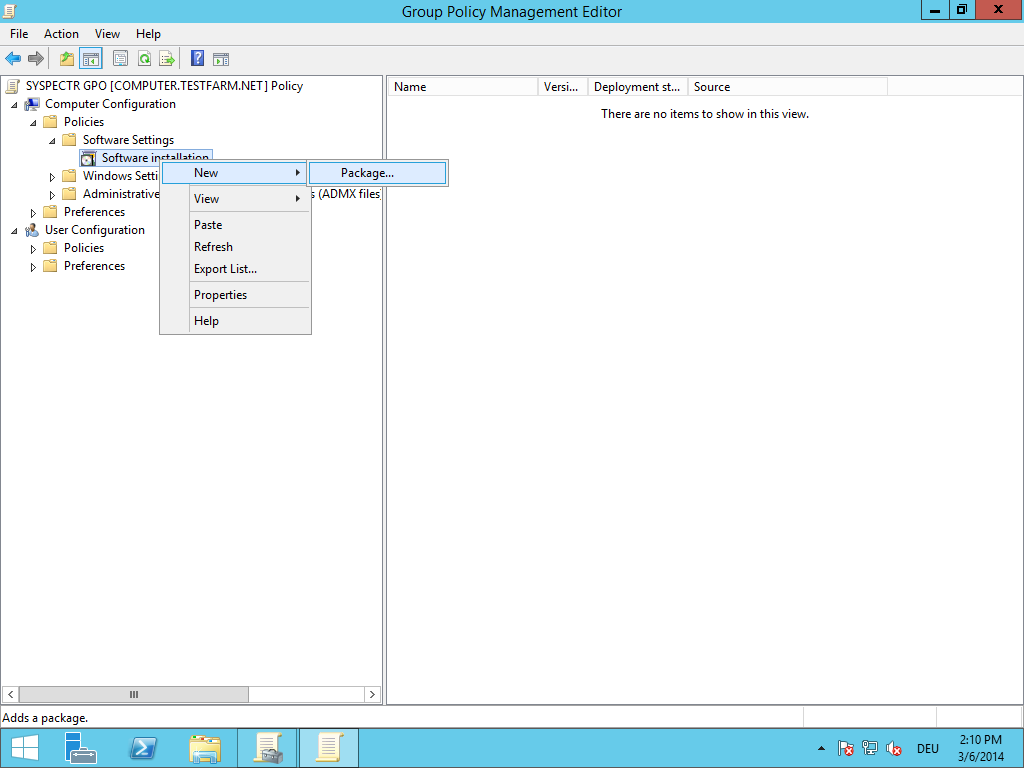
Right-click “Software installation”, select “New” > “Package…” from the menu and enter the path to the MSI installation file of O&O Syspectr.
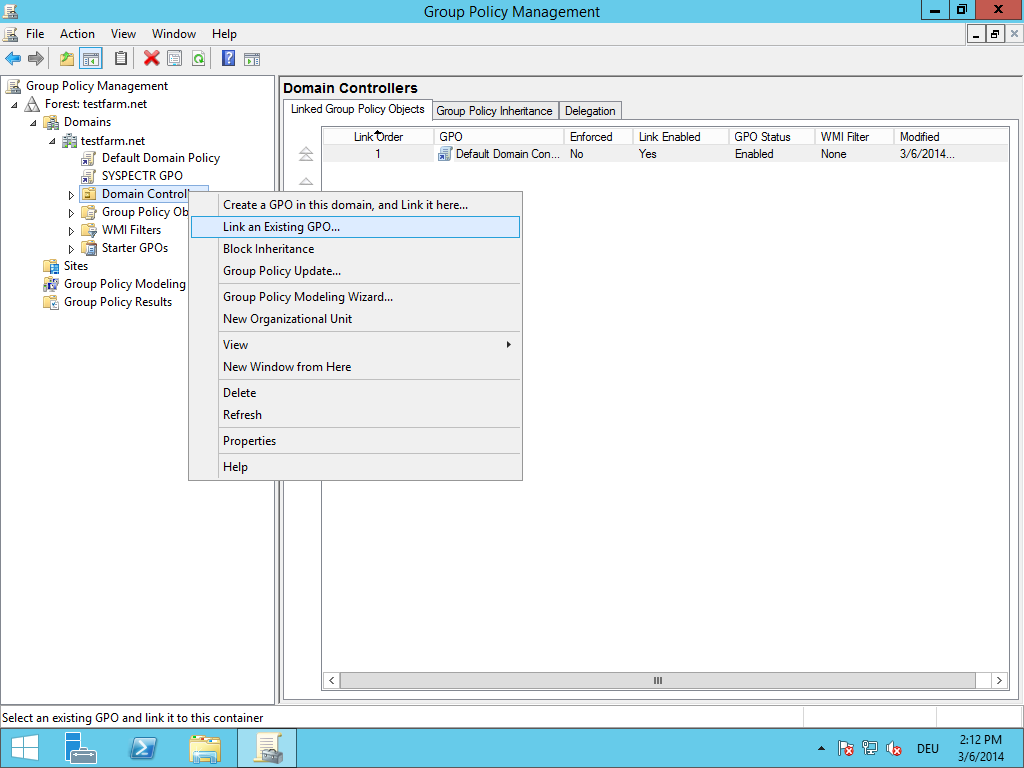
Assigning computers to the group policy
Once you’ve completed the previous steps, you can assign those computers where you want to install O&O Syspectr to the group policy. Now select the organization unit with a right-click. Select “Link an existing GPO…” from the menu and select the group policy you created (in our example, “Syspectr GPO”). O&O Syspectr will soon be installed automatically on your computers and you’ll then be able to manage them in your account.